In This Article
Get familiar with the Opus Finest Stretched Canvas Kit
Learn how to assemble the stretcher bars.
Learn how to stretch the canvas over the stretcher bars.
About the Opus Finest Stretched Canvas Kit
The Opus Finest Stretched Canvas Kit is designed for artists who value both convenience and craftsmanship.
Each kit contains everything you need to build a professional-quality stretched canvas—simply assemble using your own tools.
Opus Finest Stretched Canvas Kits reduce shipping costs and eliminate the risks of damage that come with oversized pre-stretched canvases. The Opus Finest Stretched Canvas Kit ensures your surfaces meet your exact artistic needs—without compromise.
Table of contents
Opus Finest Stretched Canvas Kit Contents

To assemble and stretch the Opus Finest Stretched Canvas Kit, you will need the following additional items (not included):
- Electric drill with #2 Robertson bit
- Hammer or Mallet
- Wood glue
- Canvas pliers
- Drop cloth
- Staple gun with 3/8” heavy duty staples
Assembling Your Stretcher Bars
1. Lay out your frame components.
It is best to work on an open, flat surface such as a table or the floor. Use a drop cloth to catch any glue drips, and keep a damp towel handy to wipe up excess glue.
Loosely assemble the frame, the front face (with the angled edge) of the stretcher bar is facing down (resting on the work surface). Place a gusset set near each corner.


2. Join the corners together.
Next, you'll connect your corners. Apply glue inside the corners of the stretcher bars where the angled corners join.
Then insert the Hoffmann plug’s grooved end into the pre-cut slot before hammering the plug into the hole. The Hoffmann name will be facing up. Wipe any excess glue with a damp rag. Repeat for all 4 corners.


3. Attach the corner gussets.
Spread glue on the recessed section where the gusset will sit. Place the gusset tight into the corner, with no gaps.
Using an electric drill, fasten the gusset in place with four 3/8" screws into the holes indicated on the illustration. (Outermost four drill holes.)


4. About Cross Braces
The number of cross-braces included in your kit varies depending on the size of the canvas; larger canvases will have more lap-jointed cross braces for increased strength and stability.

5. Assembling Cross-Braces
The centre of each of the cross-brace bars has a half-lap joint (notch) cut in, so the braces overlap and, combined, will be the thickness of just one of the bars.
Position the bars so the notched surfaces are facing each other, and spread glue into the notch.
Fit the notches together and screw into place using the pre-drilled hole and the 5/8” screw (packaged with the Hoffmann plug from step 2.)


6. Fasten cross-braces to the stretcher bars.
Using the alignment blocks provided, place the cross bars (with the screwhead(s) facing up) so they are flush with the stretcher bars.
Add glue to the ends of the cross bars, and fasten in place with the 1 1/4" pocket screws as shown, starting with the shorter cross bars.

Once the shorter cross bars have been screwed into position, proceed to the longer cross bars.
Allow the glue to dry for 24 hours before stretching the canvas onto the stretcher bar frame.
Stretching Your Canvas
1. Canvas Setup
Lay the canvas “good-side” down on a clean surface and place the stretcher frame “bevel-side” down, centering it on the canvas.
There should be at least 2” of excess canvas all the way around the stretcher. Place the stretcher frame parallel to the canvas weave.

2. Initial Setup Staples
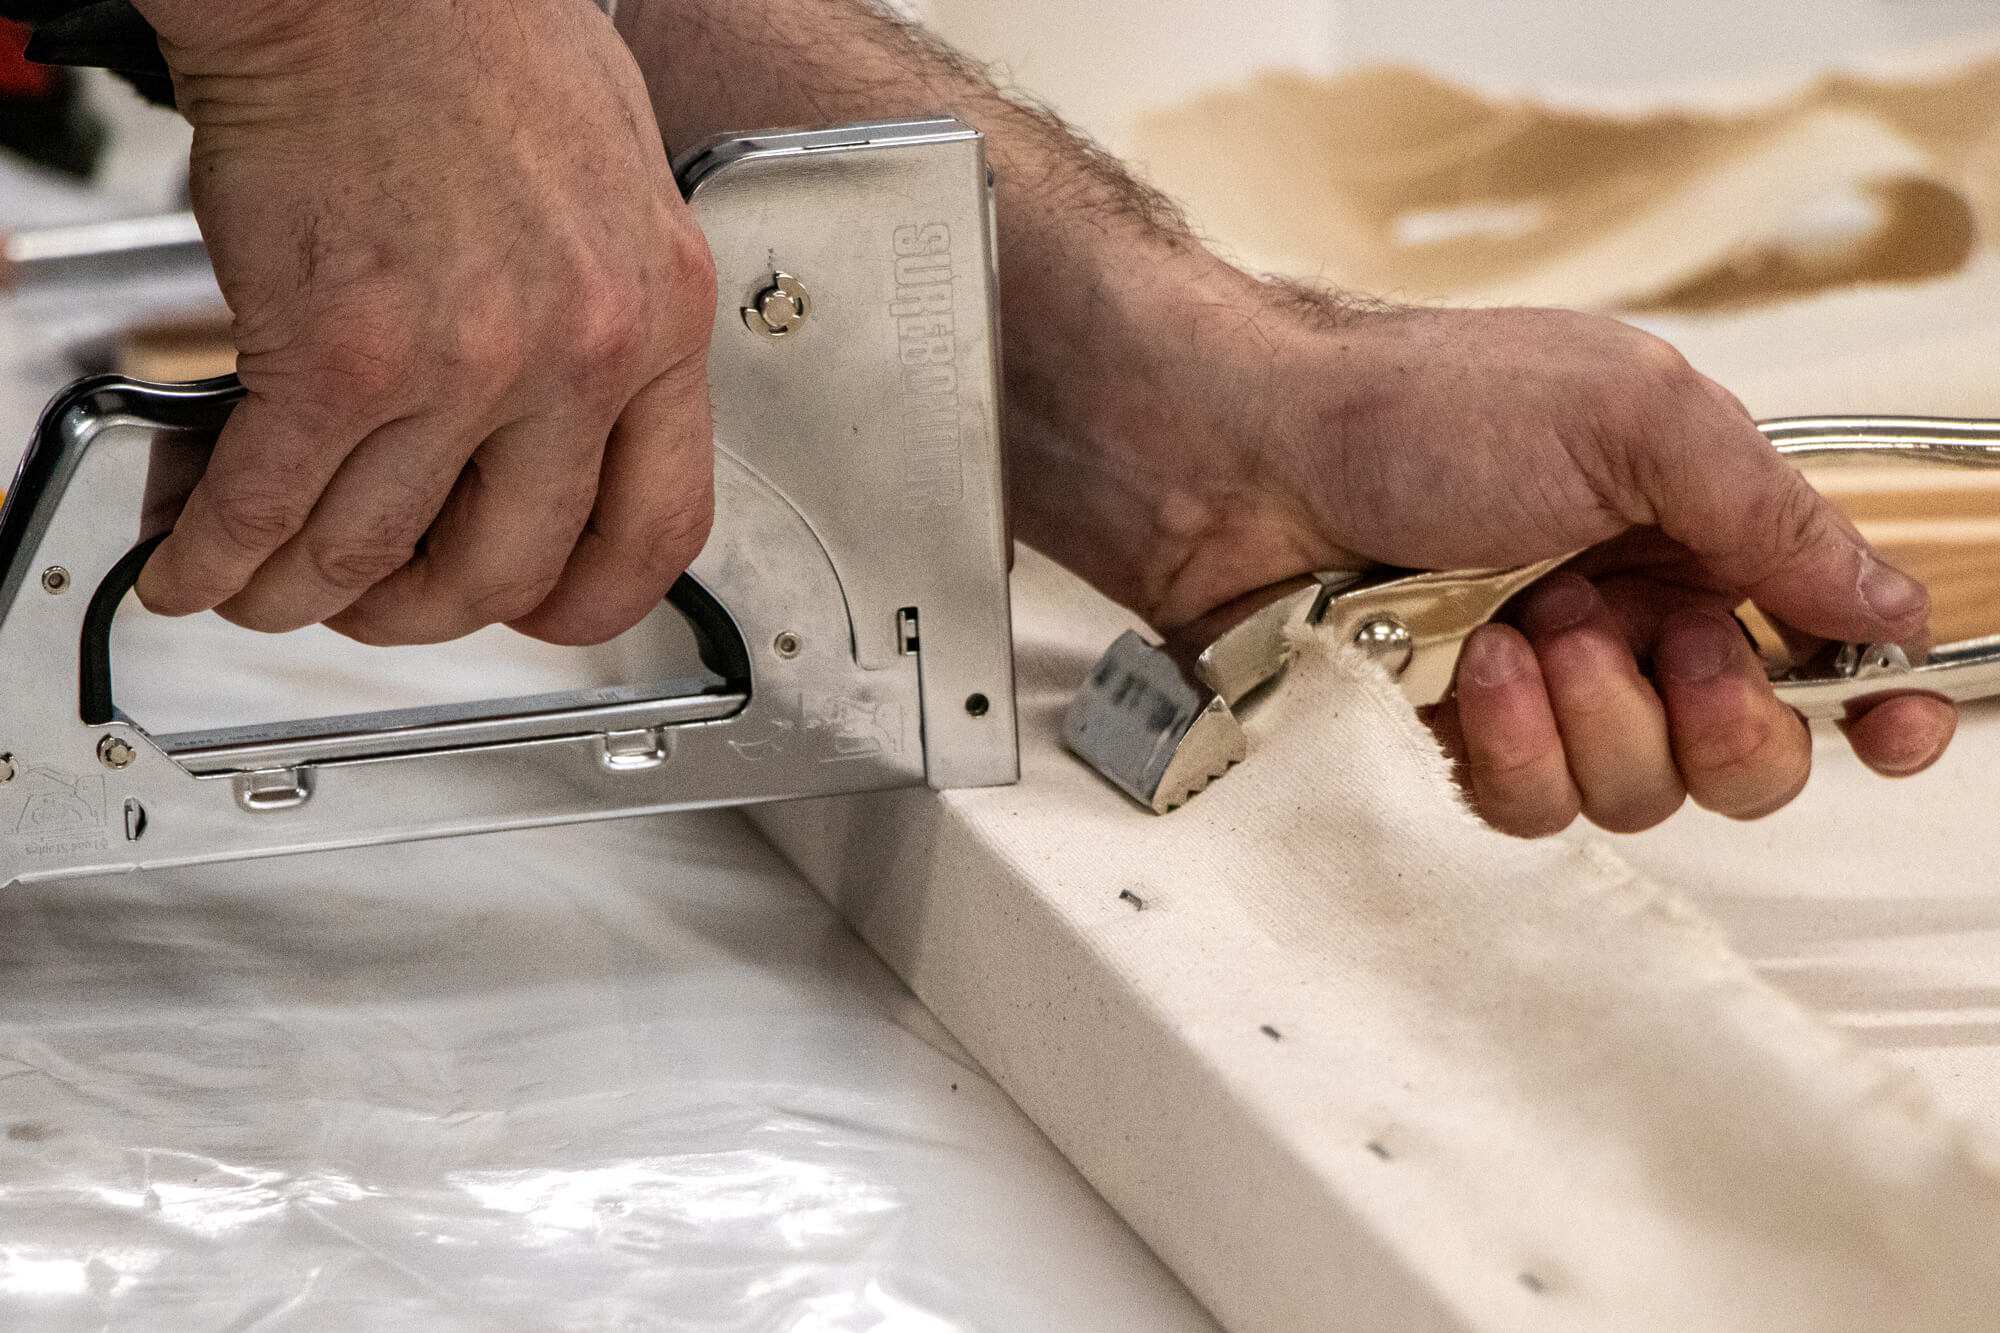
Wrap the canvas around the side of the stretcher bar to the back, and staple into the centre of the stretcher bar, on the back surface of the bar. Angle your staples diagonally across the weave of the fabric as canvas tears easier along the weave.


Using canvas stretching pliers, pull the canvas tight around to the opposite side, and drive the next couple of staples into the back surface of the stretcher bars directly opposite the first side you stapled.
Add one staple on the remaining two sides, in the same way as the previous step. This will create a diamond shape wrinkle that is tight across the centre.


3. Continue Stapling Sides
Drive staples in at regular intervals approximately 2 inches apart, moving outward from the centre, alternately switching to opposite sides. Always work outward from the centre, alternating back and forth across the canvas, and never staple one side all at once.
Use a hammer to ensure staples are firmly in the wood. As you near each corner, leave the canvas unstapled.


4. Finish the corners.
Fold the excess canvas at each corner under in a 2-part fold to make a clean corner.
To do this, first fold the excess canvas generated by wrapping the canvas from the side of the stretcher to the back surface. You should have a 45º piece of folded canvas you’re working with - fold this flat to the back of the canvas as shown left.
Next, create a second fold with the fabric that wraps up the other side of the stretcher bar, with the fold tucked in close to the stretcher bar (hidden), and a clean line of canvas wrapped neatly to the back of the stretcher.


Secure in place with a couple of staples. Make sure the corners are folded as flatly as possible — they will fit into a frame much better when you have finished your final piece.

Once you've stapled all sides and corners, you've succeeded in stretching your canvas using your Opus Finest Stretched Canvas Kit. Congratulations!